Wednesday, September 30, 2015

Was his name Kevin or Sam? Sculptin in ZBrush!!

Here is the result of a fun practice exercise. Felt a bit of a block along the way, but got through it!!


Look what happens when you select polypaint from texture!


Monday, September 28, 2015

Meet My Sweet Fish. Her Name is Quartzi

Quartzi was a lot of fun to model. For once I felt good about what I made initially. However, ZBrush caused issues with the normal maps. I probably should have developed her base polygon mesh to be a tiny bit more high res before bringer her in for sculpting. When I divided her  mesh in ZBrush, her edges got softer and softer, straying away from  her original form. This caused issues in that the sculpted result did not sync with the low poly mesh. Maybe I could have squished her low poly a little... Still next time I will be more careful.

Going about her colors, I was inspired by the idea of a rock fish and shells. Thus she's inspired by Quartz and the insides of oyster shells. I wanted her to glow by the eyes and gills. Yellow hints at that but I wish it could've been more effective. Still she looks rocky, toxic, and lovable to me. So I'm happy with her look.

I want to model sooo much more. I want to be modelling every day, because I am sensing my improvements. Even if Quartzi's final look isn't ideal. I hope to push harder. I also still have a challenge understanding and working with color mapping. I wish my colors could have come out better. Not my best paint job, but I'm glad I completed this on time at least. I will totally take over the next project, piece by piece. 


For the first time ever..UV's did not cause me any pain at allllll!!! That was sooo crazy exciting. But she's a fishy, so that's to be expected.


Had issues rendering an image without the texture. Even with a new assigned material.  hmm maybe it was the history that caused issues? Though I made sure to delete as I went. So I'm not sure.


               Here is my work in Zbrush. Note how the fins lower. I wonder what happened...


Here's my work in Mudbox. The normal map though...

                        Here is maya's rendered image, via Maya Hardware 2.0, I believe...

Edit: After help from Nick and Moon (Ms. Moon? Mrs. Moon heh heh) in class, we were able to point out the errors in my maya file and I was able to make corrections in lighting and my maps. I will paint the normal maps to fix them up. Sometime around 4am I accidentally pressed the ambient color and tried to put in a file. I was mistakeeeeeen and delusional probably. So I learned the neat basic thing of right-clicking on an option/attribute and breaking the connection. Later I also learned how to delete projects in zbrush which was also exciting.

Brought the complete mudbox look over to maya. Now to figure getting the maya look over to UE4


                                      Here I present Quartzi flying out of the water in UE4!


Monday, September 21, 2015

A Game Ready Cannon?

After sooo many countless struggles, I am proud to say that I have experienced an epic learning curve. The challenge of figuring out things on my own, the generous help from my classmates and instructor, feedback from earlier cohorts (in blogger comments), and the blissful five minute breaks playing on my 3DS all helped me get through this project.

It is not perfect. But it is a great new start in unfamiliar territory. I am so happy that I was able to get to this spot. I seriously daydreamed about this point, as melodramatic as that sounds. Being behind was absolutely horrible. So to push through all struggles and limits was a feat and totally worth all of the effort. Next time I will do better with time management and will be able to ask more in-depth questions as I go--a habit that will result in faaar less struggles.

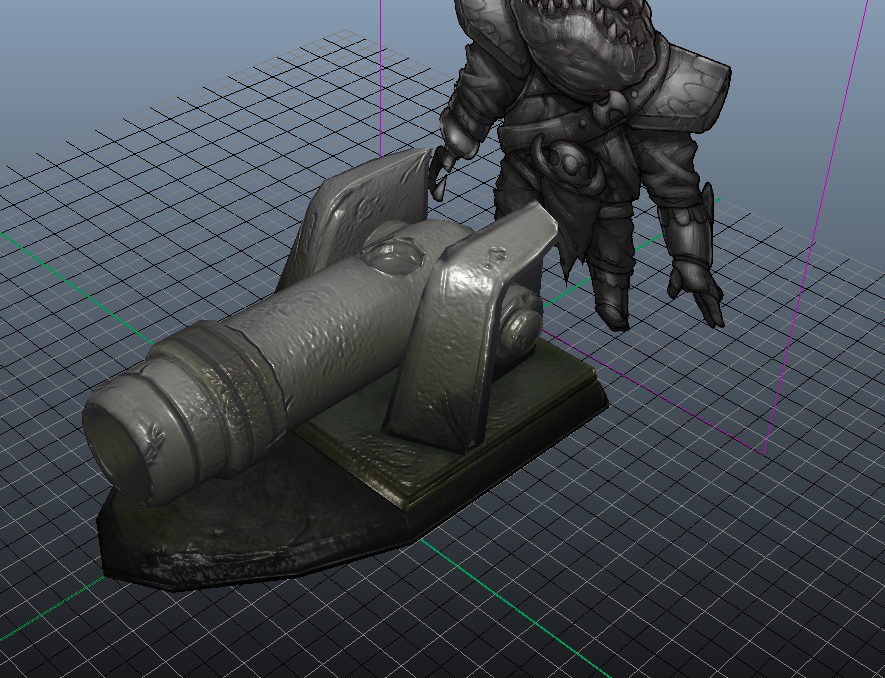
Here are my results and a few pics from the journey (eat teh cheese). I should present this better...


I did leave out the bump maps, but at the point of this previous two pics, I really missed the texture. Worked out in the long run though.
Infinity wall would not accept light in the workspace, but it did when the image rendered...

So happy to have learned so much about Mudbox. Was pretty exciting to use. But pain at times because of figuring out how to import maps and later dealing with my poor organization in the exported Photoshop layers. The layers weren't that horrible, but will be much more organized next time.


 The UV's for my Mesh Instance are still messed up. I did follow instructions, but somewhere in the import bit, I got lost and so what was fixed, became broken once I changed light values.


My previous dark color map. I had to change it quickly. Had to make new parameters also, but that helped me learn how to use the interface in UE4 with more ease.


The following are just a few of my crucial maps. The color texture map, the norms, and the ambient Occlusion... I have quite a few more, such as the specularity map that I gathered from the color map, and there was also that position map .Still these are the ones that I got stuck on the most. It all worked out indeed. The tiniest details had me, but with help and research I fought and conquered! ( ^ 0 ^)


Wednesday, September 16, 2015

Sam Star

Here is Sam. Snapping vertices didn't work for his back. I'll look into it. But he was fun to make.


Monday, September 14, 2015

Week 3 2D/3D Assignment: Baking Maps

I have never struggled with maya as I have with this project. I felt as though I fixed my model. But it hasn't been agreeing with me still, in terms of UV mapping. Everything concerning the UV map was fine, until I tried to push the model into High Res. As a result, all of my baked maps are not coming out correctly and the UV map seemed to get corrupted. My ambient occlusion map turns out black, for some reason. A glitch also occurs on the model, turning it black. If you look at the UV editor, some faces are misshapen and on of the handles has been scaled awkwardly. I tried mapping it by faces, but it still wouldn't cooperate.

Will attempt to keep pushing this cannon. But I'm horribly behind...


Wednesday, September 9, 2015

Concept Art Project

Color Scheme by Tamara with Values made by Josh

Silhouettes by Tamara

I personally worked on the environment for this project. I was inspired by Waluigi's new daper look. I wanted to create an environment where in which he owned a significant setting from the Mario Bros. series of games. So I found that he was a significant antagonist in Mario Party 3. I painted the castle based off of Peach's castle location in the game and combined concepts from there with Waluigi's island flowers and colors scheme. The mural also contains Princess Daisy rather than Peach because Waluigi supposedly has feelings for Daisy as exhibited in some of the games he's featured in. 
My challenges involved matching line quality, value, and color scheme. I used multiple custom made prushes and patterns along with the generous preset tools offered by Nick. 

Upon critique Nick advised using a haze to distance buildings in the background. That was my primary issue!!! So this advice was greatly appreciated!!!

Character Sheet made by Josh